Showing posts with label paint. Show all posts

Tuesday, December 3, 2013

crafted: painted fabric canvases

It's  been a month and a half since I moved into my new place, and I haven't put up a single piece of decoration. Normally that's the first thing I do, but I really wanna make this place look nice and not like some college student's first apartment. I've been looking all over Pinterest and magazines and EVERYWHERE looking for ideas, and I still don't know where I'm gonna go with it, but I decided to make something for the awfully bare walls.

I went to AC Moore on Sunday when they had an extra 25% off everything in the store, and got a bunch of 16x20 canvases for $2.50 each! HELLO BARGAIN! I've always wanted to have some to play with, but there's one project I've been wanting to do.

Some people cover shoe box tops with fabric as decoration... I wanted to take that one step forward and paint a quote or something on them... then I decided to cover the canvases [kinda defeating the purpose of them, but I can always take the fabric off] and paint simple silhouettes on them.


I suck and didn't take pictures during the process, but that's because it's so easy.

NEED: 
  • Canvas or shoe box
  • Hot glue/gun
  • Fabric to cover your canvas or top [$1/each if you get swatches]
  • Simple acrylic craft paint
  • Paint brushes
DO:
  1. Iron out the fabric if necessary and place it on top of the canvas.
  2. Glue down the sides, doing about two inches at a time and alternating sides. Make sure you pull it a little so it's nice and flat.
  3. If you need to, pencil an outline of what you want to paint on. 
  4. Paint.. and then love!

After I hung them up, Nugget and I both decided I should have made bigger ones... but they'll do! And I'm hoping they'll look 100x better as soon as I get some new furniture in this piece.


Also, my walls are not nearly as pink as they appear there, but for some reason my pictures always have a different tint in each place I see them.

So they're not the most artistic things ever.. but they're personalized and fun! I might end up redoing them on different fabric, but these were the only options at the time, and they'll totally work for now, don't ya think?!

love,
elizabethany

Friday, March 22, 2013

how to: diy polka dot jeans [without paint!]

So I've been crushing on these polka dot, star stamped, etc jeans, but they're all either too expensive, or don't fit me right.

Solution: Make my own!

I looked up some techniques and they all involved paint. Um... No thanks. I'd rather my pants not feel any different just because they have some design on them.

My magic wand: Clorox Bleach pen! Cost: $3. Here's how to make your own, customized jeans!


You can use old jeans or go get new ones. I went with the $10 jeans at Forever21 because they're cheap if I mess up, I know they fit, and they're hella comfortable.


Decide how you want your dots to look. Practice designs on paper. I wanted smaller dots, and I spaced them 3" apart horizontally and 2" vertically. I really only measured like every other row, so they're not perfect.

If you have some contact paper, you could use hole punches or scissors and make a stencil of sorts to stick on the jeans. You know I'm way too ADD and way more into getting something done quickly to do all that.

You could also copy some polka dots you like on Google or something after printing it out.

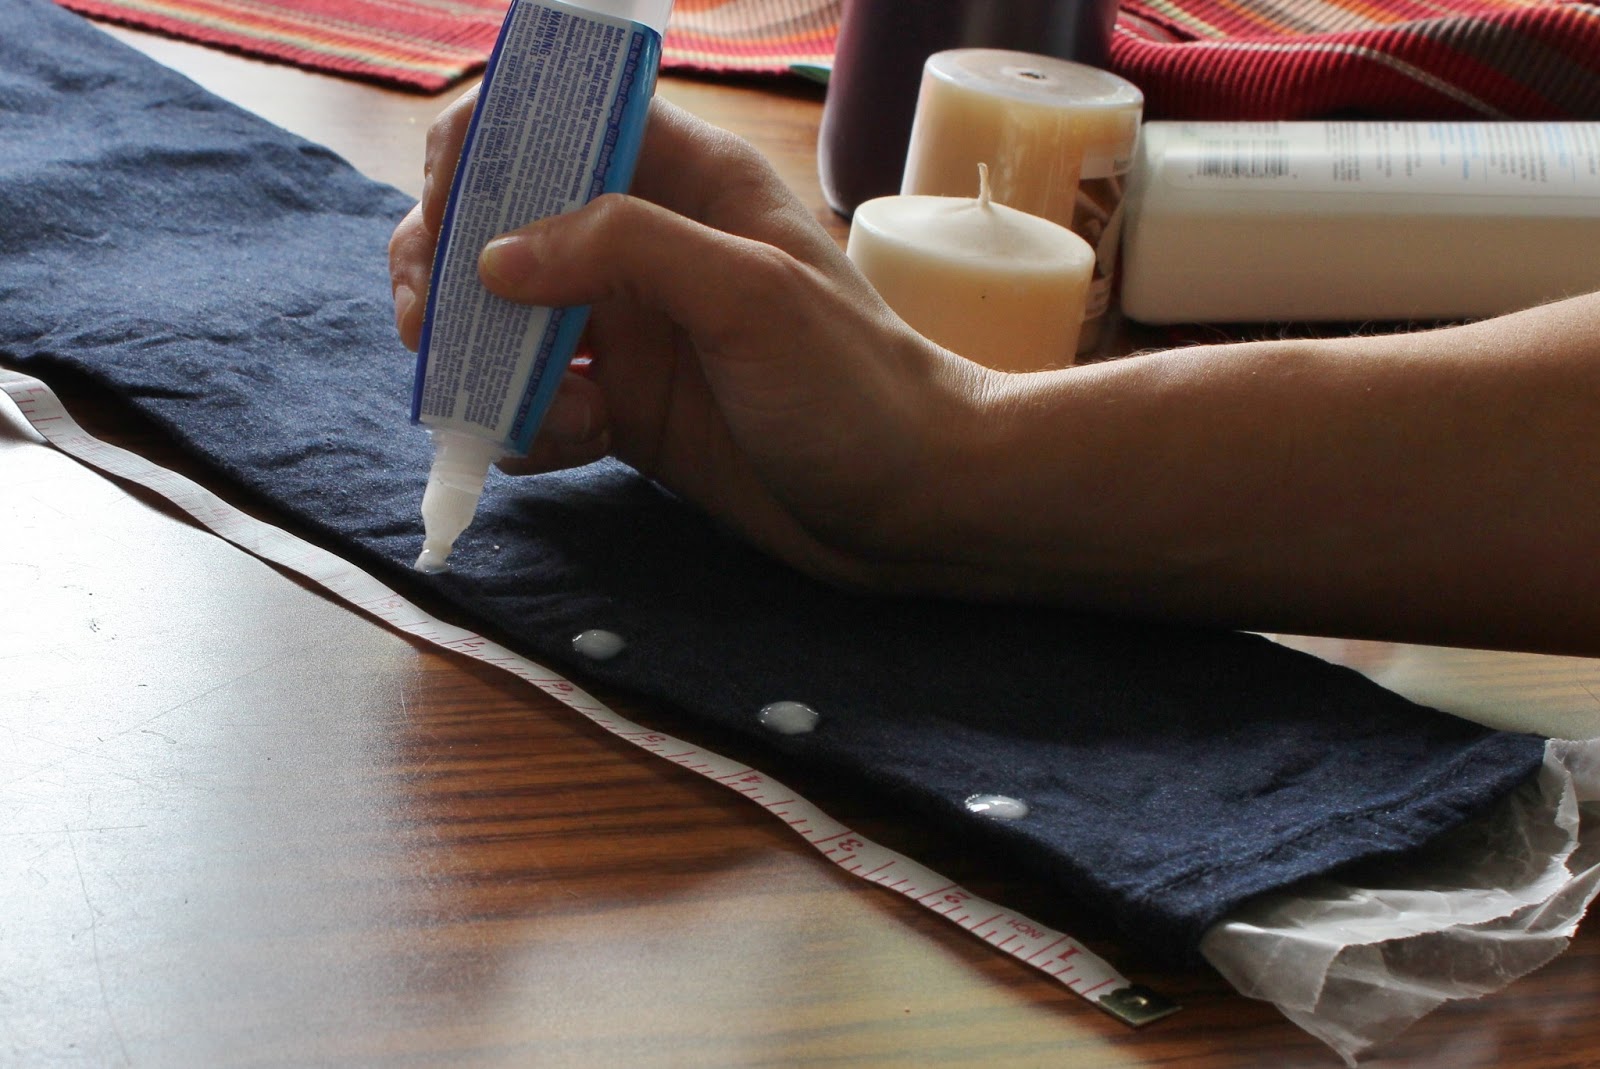
TO PREPARE: Put wax paper or plastic on the inside of the pants so the bleach doesn't get through.

The next thing a smart person would do is draw the design on the jeans with pen or marker or something... I just went straight to the bleach.


Measure up, and use it to make all your dots the same size. [Mine are about a half-inch in diameter, which are bigger than I'd like.]

Then measure across, and I just put the other rows in the middle of the "squares."

After all your bleach dots are on, let it dry for an hour or so. I made my polka dots pretty white, so I waited until the bleach dots had dried and started to crack. You can kinda see it in this picture:


If you want them lighter, wait 20-30 minutes at least, then wipe off a dot and see how light it has gotten.

After they're lightened up, carefully rinse the bleach off in your washer. I didn't put it in a cycle, just ran it under the water, then hung them to dry. Once they're dry, flip em over and prepare to do the other side.

When I did the back, I actually did my first line of dots directly along the inseam, and then made my pattern from there.


And I made the pockets their own pattern, but I'm not sure if I like that or not.

SOME THINGS TO KNOW: 
- Bubbles in the bleach are bad. It'll make dots within dots. Try to poke them until they pop.
-It took me a little over one bleach pen. 
-I tried to use an old one I had, but apparently they lose their bleach-ability. It was obvious when it dried cuz it looked extra dry and flat: 
See the faded dots? That's from the older pen. 

After the other side is done, rinse in the washer like before, but then put it through the short cycle with a little detergent, and dry however you please. BAM! You're done!

 Technically this process should take about... 4-5 hours total, depending on how you work though.

Here's the finished result:


To be completely honest, I might start getting bleach crazy and doing all sorts of designs on pockets and shirts and stuff. This could be bad. 

Now I'm going to go put a tan on my body because that whiteness is just ridiculous. 

love,
elizabethany