Showing posts with label how to. Show all posts

Tuesday, May 20, 2014

how to: get a thick bohemian braid

Are you as obsessed with the thick, bohemian braids as I am?! If my hair isn't down [and even half of the time when it is], there's always a braid involved. I was always jealous of the girls with the thick hair because they had the most beautiful braids. THEN... I discovered the trick!

It's called "pancaking" and it made all my dreams come true. 


It's the easiest, simplest, most obvious thing ever! All you do is pull the outer part of the braid out a little bit before securing it with a rubber band or bobby pin! 


My new favorite hair girl Abby from "Twist Me Pretty" taught me the trick in this fab video.


So BAM! How awesome did your life become?! Mine was made, so I'm hoping you feel the same accomplishment.

love,
elizabethany

Tuesday, December 10, 2013

i had my first clothing swap party!


I've been wanting to do a swap party for a long time, and now that I'm back home with a bunch of my girl friends, I've been super antsy for the past couple months.

The idea: Everyone brings over a bunch of clothes they don't wear much of for whatever reason, and then you pick through them! At first, you or everyone might be apprehensive when you're picking out clothes to bring, but don't be! The more and better someone brings, the more they'll walk away with! and hopefully you'll walk away with things you'll actually wear more than once.

There are a ton of ways to do this, but here's what I did: 
  1. Send out an invite. I say to invite as many people as possible, or you can keep it smaller. Explain how everything works, and tell them to bring a dish or beverage to share.
  2. Decide if you'll have a limit on things to bring. I said to bring any clothes or accessories. You could open it up even more and have people bring home decor, or just anything they want to get rid of.
  3. Decide on a system. I expected ten people to come, so I came up with a trade and raffle system. I said we'd have two categories: For trade and for donation. The trade items would only end up in a new home if the owner received something they thought was worthy of a trade. The donation items would find a new home with someone here or where I take them afterwards.
    To keep it orderly, I got some raffle tickets. Everyone would get one ticket per item they brought to donate, and we'd pick the tickets out of a bowl, and if it's your number, you get to pick from the collection!

  4. Set up. Make sure you have plenty of space for people to move around, lay out their clothes, and try things on. I had my bedroom for a changing room with a mirror, and another big mirror in the living room. I also bought some clothing racks to hang things on. [They're only about $20 and could totally be taken back afterwards if need be.]

  5. Have everyone over, mingle and warm up to strangers, then get to it! At the end, you may be able to have everyone just go through the 'leftovers" after the raffle is over. 

Unfortunately, I had a ton of people back out last minute [that lead to a bit of a Twitter rant about people not knowing how rude that is], but even with only three people coming over, we had a ton to choose from! I was a little iffy about seeing some things of mine go [and shocked that some of them didn't], but looking at what I ended up with.. I'm not mad!

My loot: 

black and white chiffon tee, metallic/floral peplum top, Jessica Simpson purse, floral/fun dress, jean jacket, heart tank, sequin skirt, and scarf... 

tan blazer, striped dress, pink cardigan, striped tees, green skater skirt, and zipper denim dress

Besides getting a bunch of new clothes, it's also fun to get stuff I wouldn't normally buy. The peplum, dresses, and jean jackets... I've always looked at that stuff but have been apprehensive about buying it. Now they were free!

And when it's all over.. put the leftover clothes in a box, and take them to a donation center! Unless you have a cat that it attached to them for some reason, of course. 


Have you ever done one, and done it differently?! Let me know how you did it! 

love,
elizabethany

Thursday, May 30, 2013

pinspired: turning a long sleeved shirt into a skirt


One of those pins that everyone pins without even really trying it is this one: Turn a long sleeve shirt into a skirt!


Well, I finally decided to give it a whirl... but I wanted mine to be a little shorter since I don't really have the typical "work environment." Turns out, it wassss a little easier said than done, but not impossible.


Hopefully that's not impossible to follow. For me, the bow looked ridiculous because my shirt was so thin and I just couldn't get it right. I liked this twisty knot front, but the sides definitely needed some tweaking to make it wearable. 
Who am I kidding?! The whole experiment takes a lot of tweaking! You tie it, and tuck the ends under and roll, until nothing is sticking out and it's flat enough for you're liking.

Eventually it worked out and I wore it with my crochet-back tank. 


Oh! And Target Clearance wedges!

My review: It's not something I plan on doing often... at least not with my collection of shirts. It rode up a lot after an hour of wearing it, probably exposing my vajayjay to the world several times. It also requires way too much fixing, bunching up, and perfecting. You could try the longer version [don't push the neck down/pull the arms up] and it might be a little better.

love,
elizabethany

Monday, May 13, 2013

pinspired: revamping a goodwill lamp


Lamps are pretty expensive if you want something a little "different." It's a little ridiculous, actually. So ridiculous, you just shouldn't spend the money.

If you go to the thrift store, you can get some old brass ones for under $10, maybe even under $5. Yeah, they're pretty ugly up on that shelf, but thanks to this pin- I had hope.


I actually had a lamp that a certain someone refused to get rid of, but was willing to let me "make pretty," so all I really had to do was get a new lampshade and some paint. My bedroom is green and brown, but I want to add a lot of bright yellow accents around. Lamps are the perfect place to start. 

The paint was $3 at Walmart [which I'll obviously be using again], and I got the simple shade at Target for $7. I rubbed down the lamp with a plastic scrubber a little bit, and then did light coats of the paint until it was covered. 

Voila!

Of course the kitties wanted to battle it out in the window while I was trying to take pictures. 

Disclaimer: The bedroom still needs so much work. Those curtains are the next things to go. They're awful.

I wish the yellow had been a lot brighter, but it matches the yellow sheets, so it'll do. I also thought about adding something to the lampshade, but I haven't decided what to do with that yet. The lining of the edges didn't look as food with the yellow. I'm thinking of doing some sort of stencil design, depending on what I do with the curtains.

The other lamps in the house better watch out. Even the newer ones that I have might be getting a similar makeover just because it's so easy and fun.

love,
elizabethany

PS: The duvet cover on the bed is amazing and was super cheap! Only $20 in any size on Overstock!

Friday, March 22, 2013

how to: diy polka dot jeans [without paint!]

So I've been crushing on these polka dot, star stamped, etc jeans, but they're all either too expensive, or don't fit me right.

Solution: Make my own!

I looked up some techniques and they all involved paint. Um... No thanks. I'd rather my pants not feel any different just because they have some design on them.

My magic wand: Clorox Bleach pen! Cost: $3. Here's how to make your own, customized jeans!


You can use old jeans or go get new ones. I went with the $10 jeans at Forever21 because they're cheap if I mess up, I know they fit, and they're hella comfortable.


Decide how you want your dots to look. Practice designs on paper. I wanted smaller dots, and I spaced them 3" apart horizontally and 2" vertically. I really only measured like every other row, so they're not perfect.

If you have some contact paper, you could use hole punches or scissors and make a stencil of sorts to stick on the jeans. You know I'm way too ADD and way more into getting something done quickly to do all that.

You could also copy some polka dots you like on Google or something after printing it out.

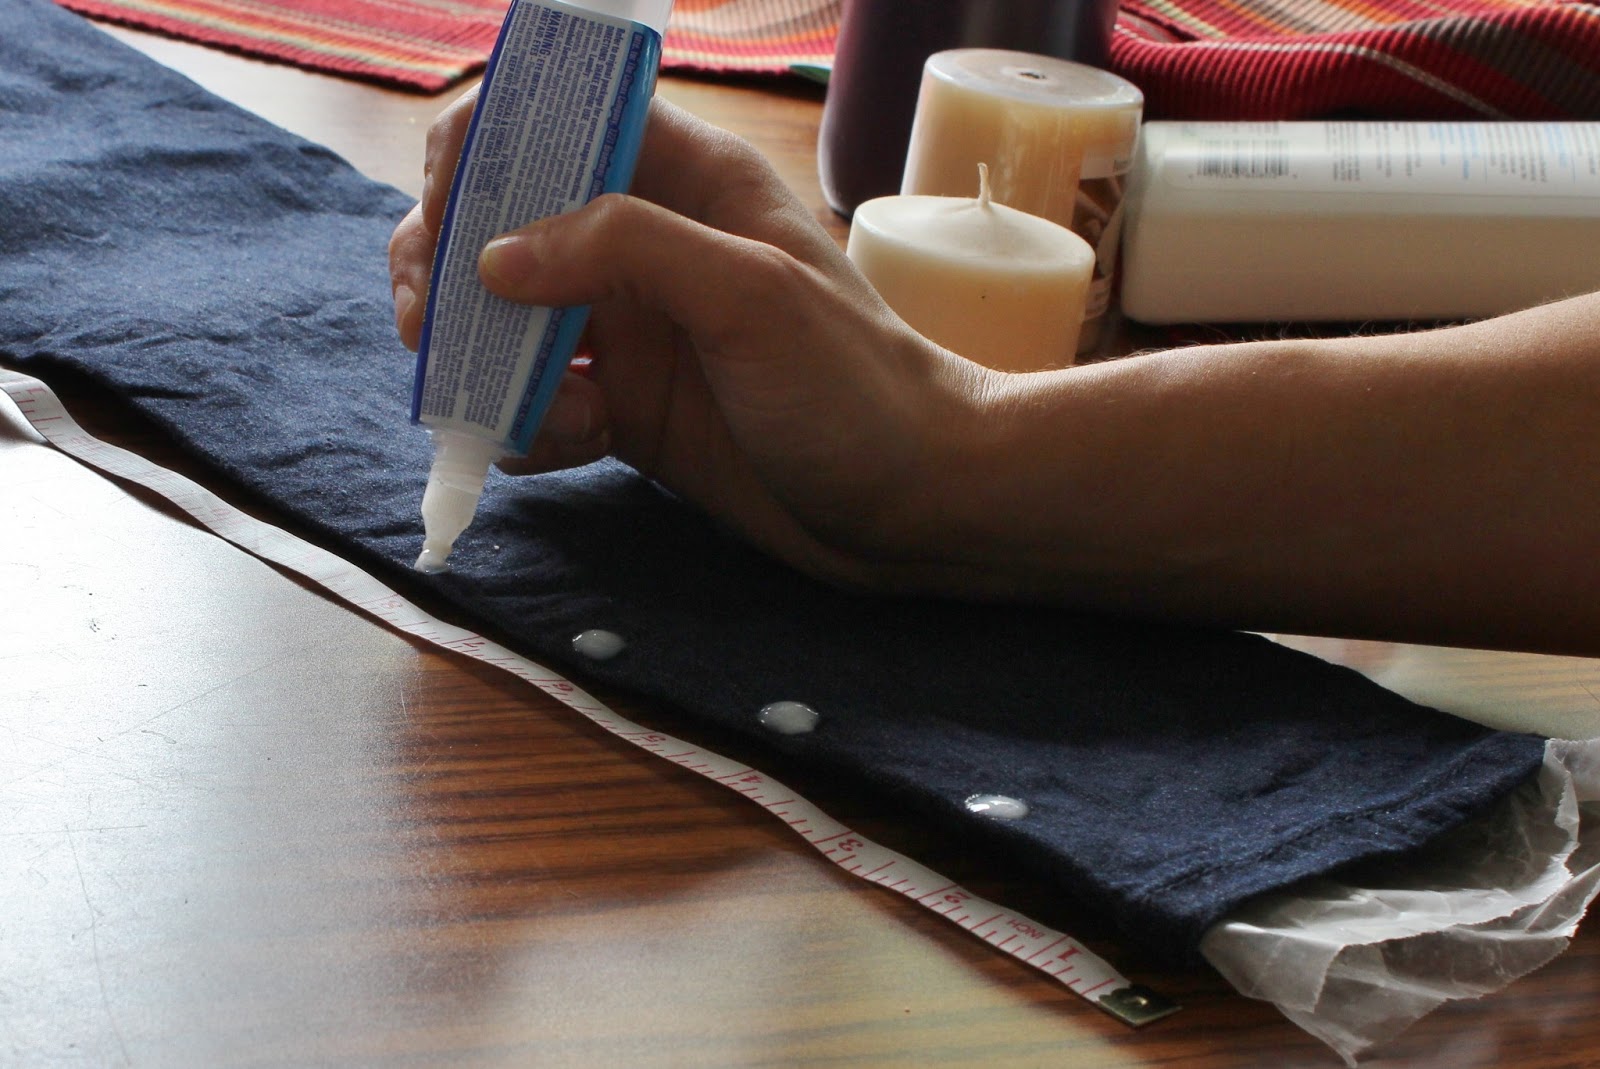
TO PREPARE: Put wax paper or plastic on the inside of the pants so the bleach doesn't get through.

The next thing a smart person would do is draw the design on the jeans with pen or marker or something... I just went straight to the bleach.


Measure up, and use it to make all your dots the same size. [Mine are about a half-inch in diameter, which are bigger than I'd like.]

Then measure across, and I just put the other rows in the middle of the "squares."

After all your bleach dots are on, let it dry for an hour or so. I made my polka dots pretty white, so I waited until the bleach dots had dried and started to crack. You can kinda see it in this picture:


If you want them lighter, wait 20-30 minutes at least, then wipe off a dot and see how light it has gotten.

After they're lightened up, carefully rinse the bleach off in your washer. I didn't put it in a cycle, just ran it under the water, then hung them to dry. Once they're dry, flip em over and prepare to do the other side.

When I did the back, I actually did my first line of dots directly along the inseam, and then made my pattern from there.


And I made the pockets their own pattern, but I'm not sure if I like that or not.

SOME THINGS TO KNOW: 
- Bubbles in the bleach are bad. It'll make dots within dots. Try to poke them until they pop.
-It took me a little over one bleach pen. 
-I tried to use an old one I had, but apparently they lose their bleach-ability. It was obvious when it dried cuz it looked extra dry and flat: 
See the faded dots? That's from the older pen. 

After the other side is done, rinse in the washer like before, but then put it through the short cycle with a little detergent, and dry however you please. BAM! You're done!

 Technically this process should take about... 4-5 hours total, depending on how you work though.

Here's the finished result:


To be completely honest, I might start getting bleach crazy and doing all sorts of designs on pockets and shirts and stuff. This could be bad. 

Now I'm going to go put a tan on my body because that whiteness is just ridiculous. 

love,
elizabethany